Quick Add Event
--OR--
The Quick Add Event form allows you to add an Event using one form.
The Quick Add Event form includes the following sections:
- Event Information
- Event Dates
- Event Attendance
- Event Options
- Registration Fee And Price Attributes
- GL (General Ledger) Information
This topic defines the fields found in each section.
To add an Event using the Quick Add Event Form, use the following steps:
- Enter or select values for at least all the required fields.
- Click the Save button.
Event Information
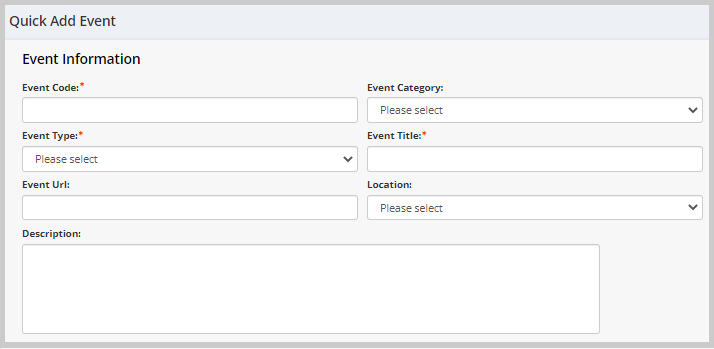
Fill in the fields as described in the table below:
| Field Name | Required? | Description |
|---|---|---|
| Event Code | Required | Enter the identifying code for the event, up to ten characters. |
| Event Category | Optional | An Event Category is a way of classifying an event for reporting and tracking purposes. This can be either a broader or narrower categorization than the event type. Example event categories include education, member’s only, remote only, in person only, and hybrid. Event Categories are specific to your association. |
| Event Type | Required | The type of program, occasion, or event activity. The Event Type is used for reporting and tracking purposes. Example event types include conference, workshop, seminar, and silent auction. Event Types are specific to your association. |
| Event Title | Required | Enter the title of the event in this field. |
| Event Url | Optional | If you have a website specific to your event, enter the URL of it here. |
| Location | Optional | Select the venue where the event will occur. |
| Description | Optional | Enter a short, text only, description. |
Event Dates
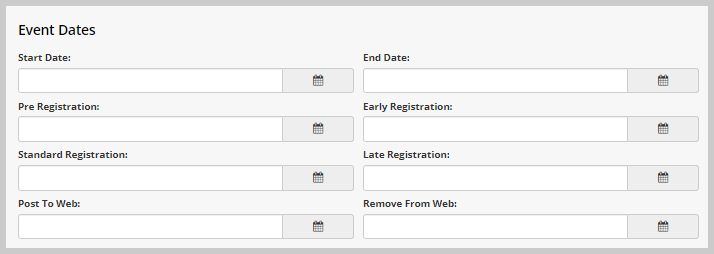
Fill in the fields as described in the table below:
| Field Name | Required? | Description |
|---|---|---|
| Start Date | Optional | Enter the date that the event will start. |
| End Date | Optional | Enter the date that the event will end. |
| Pre Registration | Optional | Enter the cut-off date for the pre-registration phase of registration. |
| Early Registration | Optional | Enter the cut-off date for the early registration phase of registration. |
| Standard Registration | Optional | Enter the cut-off date for the standard registration phase of registration. |
| Late Registration | Optional | Enter the cut-off date for the late registration phase of registration. |
| Post To Web | Optional | Enter the date on which NetForum should post the event to eWeb. |
| Remove From Web | Optional | Enter the date on which NetForum should remove the event from eWeb. |
Event Attendance
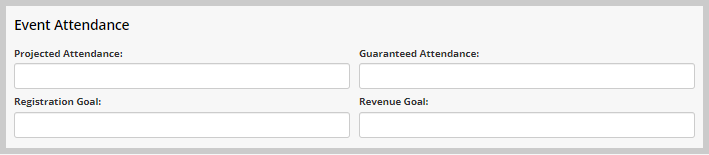
Fill in the fields as described in the table below:
| Field Name | Required? | Description |
|---|---|---|
| Projected Attendance | Optional | Enter the number of registrants you estimate for this event. Maximum five digits. |
| Guaranteed Attendance | Optional | Enter the number of registrants you guarantee for this event. Maximum five digits. |
| Registration Goal | Optional | Enter the minimum number of attendees that will allow you to meet your revenue goals. |
| Revenue Goal | Optional | Enter the revenue goal for this event. |
Event Options
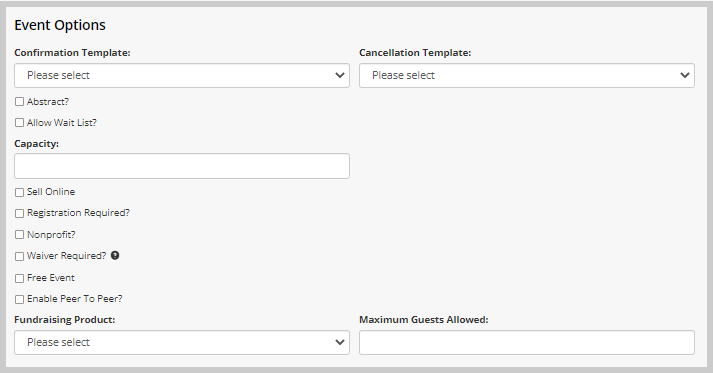
Fill in the fields as described in the table below:
| Field Name | Required? | Description |
|---|---|---|
| Confirmation Template | Optional | Select the template NetForum uses for confirmation emails. |
| Cancellation Template | Optional | Select the template NetForum uses for cancellation emails. |
| Abstract | Optional | Click this check box if you want to associate an abstract with the event. |
| Allow Wait List | Optional | Click this check box to automatically create a waiting list once an event reaches capacity. |
| Capacity | Optional | Enter the maximum number of people who can attend this event. Maximum five digits. |
| Sell Online | Optional | Click this check box if you want to make this price available on eWeb. |
| Registration Required | Optional | Click this check box to require Main event registration to participate. This check box also displays when you register for a session, and if selected, requires you to register for the main event before you register for a session. If this you do not click this check box, then registrants can register for sessions held at the event without registering for the main event. You may determine whether main registration is or is not required at the session level by selecting the Main Event Registration Required flag according to your organization's business rules for a specific session. If you have checked the Registration Required flag for the main event, then all registrants must register for the main event in order to register for any of the sessions. However, if the "Registration Required" flag at the main event level is not checked then someone can register for a session as long as the "Main Event Registration Required" flag is unchecked for that session. |
| Nonprofit | Optional | Click the Nonprofit check box if this registration fee is for a non-profit organization. |
| Waiver Required | Optional | Click this check box to indicate that the event requires a waiver to be signed in order to register. The Waiver Text box will appear if this box is checked. Enter the waiver statement in this field. With this waiver required setup, if a customer attempts to register for the event, they will be required to agree with the waiver text to complete the event registration. |
| Free Event | Optional | Click this check box if the event is free (no invoices will be created, only a registration). |
| Enable Peer To Peer | Optional | Click the enable peer to peer check box to enable this feature on eWeb. Clicking this check box generates an eWeb page that allows registrants for the event to fundraise on behalf of the organization conducting the event. For example, individuals can solicit pledges or donations by sending the URL for this page to friends and family. |
| Fundraising Product | Optional | Fundraising events must be associated with a fundraising product. Select the fundraising product that this event is associated with from the list. |
| Maximum Guests Allowed | Optional | Enter the maximum number of guests allowed at this price. You can enter up to two numbers. |
Registration Fee and Price Attributes
You can make a price or rate available for certain registrants based on their types and other characteristics. Use the fields in this section to define the type of registrant who can receive the registration fee.
Only the initial registration fee is added in this section. Most of this section is in the form of drop-down lists, so the proper setup of these lists is important.
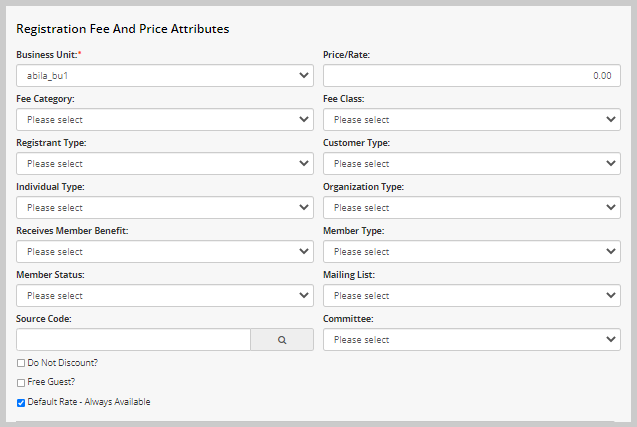
Note: Price Attributes are for a specific event only e.g. they do not flow down to an event, session, or track within a parent event. The more Price Attributes attached to a specific fee, the fewer people will qualify for that event fee.
Fill in the fields as defined in the table below; each selection will restrict the fee further to only customers who meet the defined attributes:
| Field Name | Required? | Description |
|---|---|---|
| Business Unit | Required | This field defaults to the default business unit for the association. Verify that this is the correct business unit/change it as appropriate. |
| Price/Rate | Optional | Enter the price in dollars and cents. Enter up to 21 numbers. |
| Fee Category | Optional | Select the fee category from the drop-down box. Examples of fee categories include: Member fee, Registration fee, Non-Member fee. |
| Fee Class | Optional |
Select the fee class from the drop-down box. The fee class is used in conjunction with the event registration cut off dates to default the start and end dates of the price being added. If you select a fee class of pre reg, the system will automatically set the start date to today’s date and the end date to the Pre Registration date. If you select early as a fee class option, the start date will be one day after the Pre Reg date and the end date will be the Early Registration date. If you select standard as a fee class option, the start date will be one day after the Early Registration date with an end date of the Standard Registration date. If you select late as a fee class option, the start date will be one day after the Standard Registration date with an end date of the Late Registration date. |
| Registrant Type | Optional | Select the registrant type from the drop-down box. Examples of registrant types include: Guest, Speaker, Student, Vendor. |
| Customer Type | Optional | Select the customer type from the drop-down box. |
| Individual Type | Optional | Select the individual type from the drop-down box. Examples of individual types include: Board Member, Employee, Student. |
| Organization Type | Optional | Select the organization type from the drop-down box. Examples of organization types include: Corporation, Non-Profit, Association. |
| Receives Member Benefit | Optional | If this fee is only for customers receiving member benefits, select Member. If the fee is for customers who do not receive member benefits, select Non-Member. |
| Member Type | Optional | Select the member type from the drop-down box. Examples of member types include: Premium, Gold, Standard. |
| Member Status | Optional | Select the member status from the drop-down box. Examples of member status include: Active, Inactive, Hold. |
| Mailing List | Optional | To offer this price only to individuals who are a certain mailing list, select the mailing list from the drop-down box. |
| Source Code | Optional | To require a source code be entered to receive this price, click the look up icon to see a list of available source code records. Click one to add it to the source code field on the Quick Add Event form. |
| Committee | Optional | To offer this price only to individuals who are on a particular committee, select the committee from the drop-down box. |
| Do Not Discount | Optional | Click this check box if you do not want to allow discounts to this price. |
| Free Guest | Optional | Click this check box if you want to allow registrants to have a free guest. |
| Default Rate - Always Available | Optional | If you want this price to show for all customers regardless of their price attributes, select this box. |
GL Information
Fill in the General Ledger Accounts fields as defined in the table below:
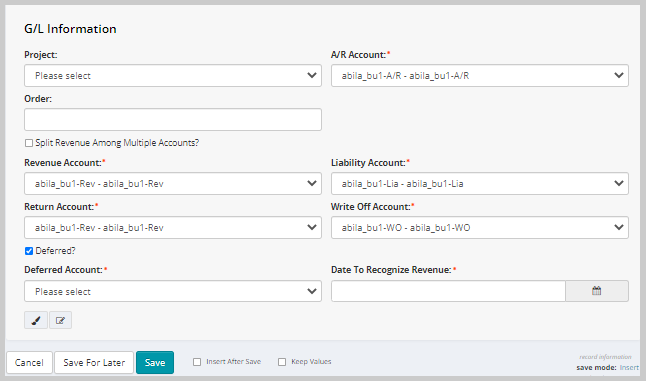
Note: Management or accounting should determine the business unit, project, and all appropriate G/L accounts. The business unit and G/L accounts can be set to specific default values.
| Field Name | Required | Description |
|---|---|---|
| Currency | Optional | Select the currency to be used for the initial price you are creating for this Event. An Event can have multiple fees and prices with different currencies, if needed. |
| Project | Optional | The project field is an accounting code reference, not a billable time entry project. |
| A/R Account | Required | Select the account for Accounts Receivable from the drop-down box. The account you choose is debited every time you sell an event registration. |
| Order | Optional | The order is used to determine how a partial payment is applied to an invoice with multiple line items. |
| Split Revenue Among Multi-Accounts | Optional | To split revenue, select the Split Revenue Among Multiple Accounts checkbox. If revenue is split, then those revenue accounts will need to be set up under the Price Profile. (Go to the Event Profile, Registration Fees child form > Prices grandchild form and click the Goto arrow to go to the Price Profile.) |
| Revenue Account | Required |
Select the account for revenue from the drop-down box. This account is credited when an event registration is sold (non deferred fees) OR when revenue is recognized (deferred fees). |
| Liability Account | Required | Select the account for liability from the drop-down box. This account is credited when a paid invoice is cancelled. |
| Return Account | Required |
Select the account for return from the drop-down box. This account is debited when an invoice is cancelled. For most associations, the return account is the same account used for the revenue account. |
| Write Off Account | Required |
Select the account for write off from the drop-down box. This account is debited when you create a write off. This is typically either an expense account or the revenue account for the product. |
| Deferred | Optional |
Click this check box if the revenue for this event must be deferred. |
| Deferred Account | Optional | If this is a deferred fee, then select an account from the drop-down box. This account is credited when an event registration is sold (deferred fees only) and then debited when revenue is recognized. |
| Date To Recognize Revenue | Optional | Enter a date on which the deferred revenue will be recognized. |
| Insert After Save | Optional | Click this check box to return to the Quick Add Event page after clicking the Save button. |
| Keep Values | Optional | This check box works only in conjunction with Insert After Save. Click this check box to keep all the values you entered except Event Code and Event title after you click the Save button. |
Click the Save button to go to the newly created Event Profile.
Click the Save for later button to save your changes and continue working in the Quick Add Event form.
Click the Cancel button to lose your changes and return to the previous screen.